
Sabino & Company Secure Client PortalClient access to tax returns and other confidential documents with our secure online document portal. |
Sabino & Company
Secure Client Portal User Guide
Table of Contents:
- Requirements of your Computer System
- Internet Explorer Settings
- Log-in Tips
- Getting Started
- Download Files from the Portal
- Add Files to the Portal
About the Sabino & Company Secure Client Portal
At Sabino & Company, we take the privacy and security of your information seriously. That is why we use our Secure Client Portal for transmitting confidential tax and financial information with each client. A Portal User ID and login instructions are provided to each Sabino & Company client via email. All documents made available to each client on the Sabino & Company Secure Client Portal can be printed, transferred to another file on your computer, saved on the portal or permanently deleted by you as you see fit.
System Requirements
- Portal is built on a Microsoft Silverlight 4 platform and a user may be prompted to install Silverlight from Microsoft’s website. The installation typically takes less than one minute to complete and is completely safe.
- Portal will support all browsers on PC and Mac that are compatible with Microsoft Silverlight 4.
- A complete list of browsers and operating systems that support Silverlight 4 can be found at http://www.microsoft.com/getsilverlight/locale/en-us/html/installation-win-SL4.html.
Internet Explorer
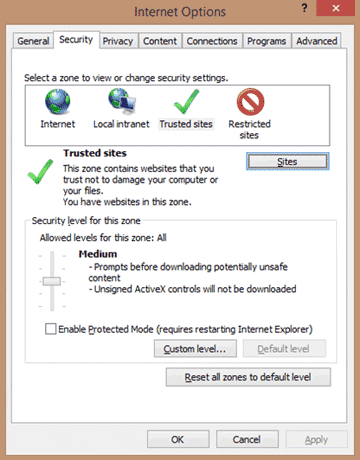
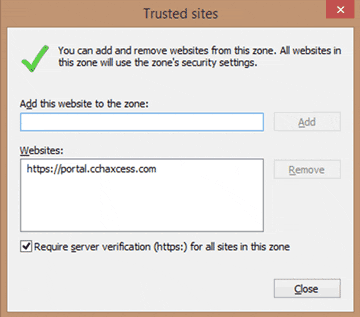
Internet Explorer users are required to add the portal URL to Trusted Sites.
Internet Options | 1. Open Internet Explorer and browse to https://portal.cchaxcess.com/portal |
Trusted Sites | 3.Click Add to move the Portal URL to the trusted sites zone, then click close. |
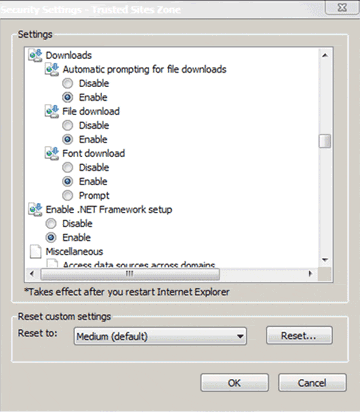
Custom Level | 4. Click Custom level. |
Portal Login
Launch your internet browser and browse to https://portal.cchaxcess.com/portal
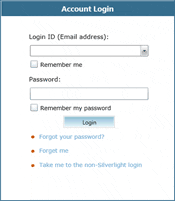
Login Tips
- Refer to the emails received from the firm for login information.
- The Login ID (email address) is not case sensitive; the temporary password provided via email is case sensitive.
- You will be required to change your password upon logging in for the first time and answer at least one security question. Your security questions can help you access your portal if you ever forget your password.
- Your new password may be from 8 to 32 characters in length, must contain at least one alpha character, one numeric character, and one special character (e.g. !, @, #, etc.). The password is case sensitive.
- Your password may be reset at anytime by clicking “Forgot your password?”
- If you cannot, or prefer not to, install Silverlight on your machine, click “Take me to the non-Silverlight login” to use our lightweight version of the Portal that does not require Silverlight. Advanced features are not available from the non-Silverlight version of Portal. Alternately, you can access the non-Silverlight login page directly at https://portal.cchaxcess.com/sui.
Getting Started
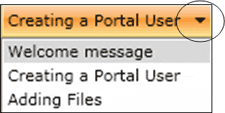
Getting Started Ribbon | A short “Welcome to the Portal!” message will be presented to each user upon their initial login to Portal. The welcome message simply directs users to the expandable/collapsible Getting Started menu. Click the Getting Started ribbon on the left side of the screen to expand and view this menu. |
Menu Selection | Click the black arrow to view Getting Started menu options. Creating a Portal User will only be visible Portal Admin users. The Welcome Message and Adding Files will be visible to all Users. |
Adding Files | Getting Started menu Key Features
|

Downloading Files From Portal
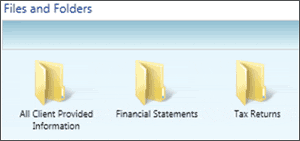
Files and Folders | Folders are used to organize files on the portal. Simply double-click on a folder to view your files. |
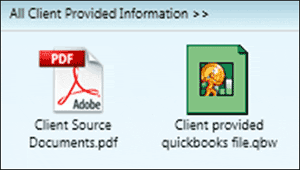
Portal Documents | A simple way to view or save a file is to double-click on the file name. Double-clicking on a file will display the file download screen, displayed below. |
File Download | Click open to view the file or save to download\save a copy to your computer or network. When a file is downloaded a copy is created and does not affect the file on your portal. |
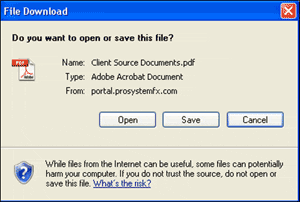
It is recommended to download/save a copy of your deliverable items from Portal as most files will not remain there indefinitely. The firm can provide more detail regarding how long files will be accessible via Portal.
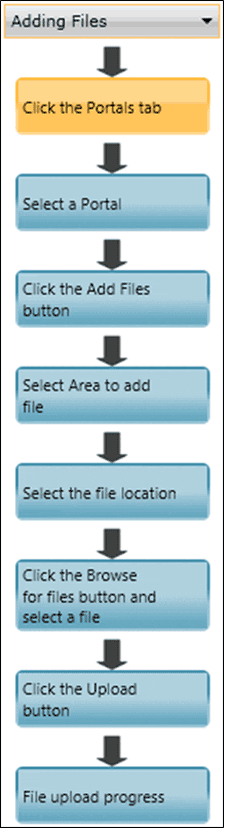
Add Files to Portal
Steps to Adding Files to Portal
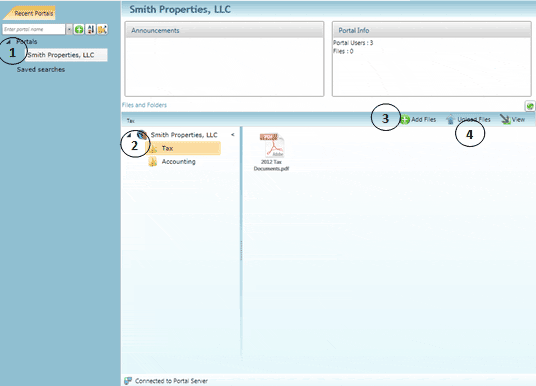
On the Portal Home page:
- Select a portal (only for those users that have access to multiple portals)
- Select the file location (folder)
- Click
 to select file(s) via Windows Explorer or Drag and Drop files from your computer to the Files and Folders section
 - Click
 to upload the file(s) to Portal